Category Archives: Pipeline

Where did my request body data go?

Problem

The solution had several API controllers (see image above) that expected data to be posted in the body. Then for no reason the body data was null, and therefore the controller started throwing argument null exceptions, and the front end of course stopped working.

The issue was caused by a new custom HttpRequestProcessor (see image below), which was called in the httpRequestBegin pipeline.

private void ProcessApi(HttpRequestArgs args)
{
      using (var mem = new MemoryStream())
      {                
           HttpContext.Current.Request.InputStream.CopyTo(mem);
           HttpContext.Current.Request.InputStream.Seek(0, SeekOrigin.Begin);
                
           using (var reader = new StreamReader(mem))
           {
                mem.Seek(0, SeekOrigin.Begin);
                var body = reader.ReadToEnd();

                if (string.IsNullOrEmpty(body))
                    return;

                var requestBody = JsonConvert.DeserializeObject<RequestBody>(body);
                _setLanguageService.SetLanguage(requestBody);
           }
      }            
 }

It needed the data from the request body, for some reason the setting the position back to 0, did not work?

Therefore the controller got null instead of the data contained in the body.

Solution

Therefore it was necessary to copy the stream contents into a memory stream, read the data from that stream, then deserialize the class. See the solution below.

I hope this helps, and this issue was found Sitecore 8, with a lot of customization, patches, code and modifications over the past 16 years.

Un-tangling Sitecore configuration includes

I recently worked on a project that used SlowCheetah (XML Transforms) and Octopus variable substitution to modify the custom Sitecore include files.

It proved difficult to determine what the Sitecore configuration was in each environment, especially for the content delivery servers, as it was not possible to call showconfig.aspx.

Solution

Each time the application starts, it writes out the contents of the merged Sitecore configuration to a file in the logs folder. The file name contains the instance name, date and time created. So in addition to seeing the current configuration, you can also see how it changes over time (very useful after a deploy where nothing works).

Get the merged Sitecore configuration

It turned out to be very simple to implement, as it only takes one line of code to get the merged Sitecore configuration:

XmlDocument xmlDocument = Sitecore.Configuration.Factory.GetConfiguration();

Create a custom pipeline processor class

Create a processor for the initialize pipeline, so each time Sitecore is started the processor will be called to ensure that the configuration is saved. Create a public class with a public member called Process, which accepts a parameter of type PipelineArgs. The code below is all that is needed.

namespace Exmaple
{
  public class SaveSitecoreConfiguration
    {
        public void Process(PipelineArgs args)
        {
            string fullPath=string.Empty;
            try
            {
                XmlDocument configuration = Factory.GetConfiguration();
                string filename = string.Format("SitecoreConfiguration.{0}.{1}.xml", DateTime.Now.ToString("yyyyMMdd-hhmm"), Sitecore.Configuration.Settings.InstanceName);
                string logFolder = Sitecore.Configuration.Settings.LogFolder;

                // Is it a relative or virtual folder ?? could be a configured to point at an physical directory
                if (!Directory.Exists(logFolder))
                {
                    logFolder = HttpContext.Current.Server.MapPath(logFolder);
                }
                

                fullPath = Path.Combine(logFolder, filename);
                configuration.Save(fullPath);

            }
            catch (System.NotSupportedException supportedException)
            {
                Sitecore.Diagnostics.Log.Error(string.Format("Error saving sitecore configuration, path:{0}", fullPath), supportedException, this);
            }
            catch (Exception exception)
            {
                Sitecore.Diagnostics.Log.Error("Error saving sitecore configuration", exception, this);
            }
        }

    }
}

Configuration Changes

The processor has to be added to the initialize pipeline, I would recommend you create an include file to achieve this, but for the sake of clarity I have added it directly to the web.config, see below.

example

Now every-time Sitecore is started it writes out the configuration, so it is easy to get the configuration and monitor how it changes for all environments over time.

I hope this helps you untangle the Sitecore includes which at times can be a nightmare.

How to suspend sitecore schedule publishing – aborting the publish pipeline is not enough, it requires an exception!

The customer wanted the ability to suspend scheduled publishing, but could still make manual publishes (i.e. started from the Sitecore client).

Each time a publish is started it runs the publish pipeline. Therefore it is possible to insert a custom pipeline step at the beginning (see below) to do the following:

  1. Identify if it was a scheduled publish
  2. Check if a check-box in Sitecore is ticked
  3. If both conditions are met – abort the publish pipeline to stop the publish

publish pipeline

Unfortunately aborting the publish pipeline is not enough 😦

In the initial code I would abort the pipeline using AbortPipeline() (see below) as I assumed this was enough to stop the publish. The pipeline was aborted and no items were published, but the code that starts the pipeline still updated the properties table indicating that the publish had succeeded:-(

code

Side affect

This had the side effect that when the schedule publishing was enabled again, any items that were modified or created whist the publishing was disabled would not be published as when scheduled publishing was resumed Sitecore believed that they had already been published.

Solution

After checking the code using reflector I determined if I threw an exception, it would ensure that the properties table was not updated. So the publish was completely cancelled, and when scheduled incremental publishing was resumed it will publish all the items that have been modified since the last successful publish, and not since the last aborted publish.

How to identify a scheduled publish

Not the nicest solution but it works! I check the publish context user which can have the following values:

  1. The user logged into sitecore – If publish is started from the Sitecore client
  2. sitecore\Anonymous – if the publish is started by the scheduler

If the value is sitecore\Anonymous I know that it is a scheduled publish.

is schedules


How to add a button to the sitecore content editor to download data as a CSV file

In this blog I will explain how to add a button to the content editor and download data as an CSV file. For this example I will assume that we want to download the data for a given web form for marketers form as a CSV file.

Adding the button
the button

Contextual Ribbons

You may not have noticed but this is a contextual ribbon that is it is only shown when the item is based on the forms template, as it gives no meaning to have the download data as CSV added to all items.

First you need to swap to the core database, and navigate to the Contextual Ribbons item for the content editor i.e. /sitecore/content/Applications/Content Editor/Ribbons/Contextual Ribbons.

This is where all the ribbons that are only shown for specific item types are placed; within this folder there is a forms toolbar, which contains a form strip, which contains a forms chunk, which in turn contains the “Export Data as CSV” button item.

button item
The most important part of the button item is the click field, which defines the command name that will be raised when the button is clicked (I will explain how to hook this up in more detail later).

But how is a contextual ribbon associated with a given template – well that part is easy on the template item under the appearance section there is a ribbon field which can define a contextual ribbon or toolbar to be shown.

co0ntextual form

How to hook the button click up to the code that is to executed? 

We have to add a command item to the /app_config/commands.config file to bind the command name to the class that is going to provide the functionality.

<command name="forms:exportformdata" type="WFFM.SQLServer.SaveToDatabase.Infrastructure.Commands.ExportFormDataCommand, WFFM.SQLServer.SaveToDatabase" />

The class must inherit from the Sitecore Command class, and override the Execute function.

    internal class ExportFormDataCommand : Command
    {
        public override void Execute(CommandContext context)
        {
            Assert.ArgumentNotNull(context, "context");
            Assert.IsNotNull(context.Items, "context items are null");
            Assert.IsTrue(context.Items.Length > 0, "context items length is 0");

            Item contextItem = context.Items[0];
            Assert.IsNotNull(contextItem, "First context item is null");
            OpenNewWindow(contextItem.ID, contextItem.Name);
        }

        private void OpenNewWindow(ID id, string name)
        {
            Assert.ArgumentNotNull(id, "id");
            UrlString url = new UrlString(Constants.Url.ExportFromDataPage);
            url.Append(Constants.QueryString.Name.ItemId, HttpContext.Current.Server.UrlEncode(id.ToString()));
            url.Append(Constants.QueryString.Name.ItemName, HttpContext.Current.Server.UrlEncode(name));
            SheerResponse.Eval(string.Format("window.open('{0}');", url));
        }
    }

Its not very elegant, but the code generates a URL which points to a aspx page that will stream the data. The Eval method of the sheer response, allows me to execute JavaScript on the client which in this case opens a tab/window.

The aspx page doesn’t do that much it just sets the ContentType to “text/csv” and streams the data. If you want to see the complete implementation, you can download it from github

Hope this was helpful, Alan

Sitecore SPEAK – Pipelines

As promised here is a post about how to create a simple client side Sitecore SPEAK pipeline.

For an introduction to pipelines, see my first blog about Pipelines. I am going to create a pipeline which serves no purpose at all, it just writes “step 1”, “step 2” & “Step 3” to the console. There are 5 steps to implement a pipeline:

  1. Declare the pipeline
  2. Declare individual pipeline steps
  3. Add the steps to the pipeline
  4. Include JavaScript
  5. Execute the pipeline

How to declare a pipeline

Firstly you check if the pipeline is already declared, and if not you create it.


Sitecore.Pipelines.MyFirstPipeline = Sitecore.Pipelines.MyFirstPipeline ||
                                 new Sitecore.Pipelines.Pipeline("MyFirstPipeline");

Declare the step

Declare the pipeline step by creating an object which has a priority property and an execute function which accepts a context variable. The execute function is the where you write the code for this step, in this case log “step 1” to the console, or abort if the context.hasRun == true.


var step1 =
 {
   priority: 1,
   execute: function (context) {
     if(context.hasRun==true){
       context.aborted = true;
       return;
     }
     console.log("step 1");
   }
 };

The priority property defines the sequence that the steps are executed in, and as I mentioned in my previous post this is not ideal 😦 but Anders and I had an idea how to solve this so please read this great post by Anders.

But back to the point. If you want to abort a pipeline, you just have to set the property abort on the context to true, and then no more steps will be executed.

Add a step to the pipeline

Its easy to add a step to a pipeline, you just call the add method.

Sitecore.Pipelines.MyFirstPipeline.add(step1);

Not that it is a requirement, but I would suggest that all the code for a single step is contained in a single JavaScript file.


define(["sitecore" ], function (Sitecore) {
  Sitecore.Pipelines.MyFirstPipeline = sitecore.Pipelines.MyFirstPipeline || new Sitecore.Pipelines.Pipeline("MyFirstPipeline");
  var step1 =
  {
    priority: 1,
    execute: function (context) {
     if(context.hasRun==true){
       context.aborted = true;
       return;
     }
     console.log("step 1");
    }
  };
  Sitecore.Pipelines.MyFirstPipeline.add(step1);
});

Include JavaScript

Before we can call the pipeline we need to ensure that the JavaScript is loaded.
SPEAK wraps up the requireJS framework, so we can define which JavaScript files should be included.
I would recommend a single JavaScript file for each pipeline that is responsible for loading all the pipeline steps. Therefore when you want to execute a pipeline you only have to include one file. Also if you add steps to a pipeline you only have to update a single file and not all the places where the pipeline is executed.

var basePath = "/-/speak/v1/mfp/";
define(
    [
        basePath + "MyFirstPipeline.Step1.js",
        basePath + "MyFirstPipeline.Step1.js",
        basePath + "MyFirstPipeline.Step1.js"
    ]
)

When creating pipelines I tend to use the following naming convention:

[Pipeline Name].[Step Name].js and the file that includes all the steps is called [Pipeline].js, for example the file structure for MyFirstPipeline would be as follows.:

file structe

BasePath

So how does Sitecore know where to look for the JavaScript files, and what is that base path?

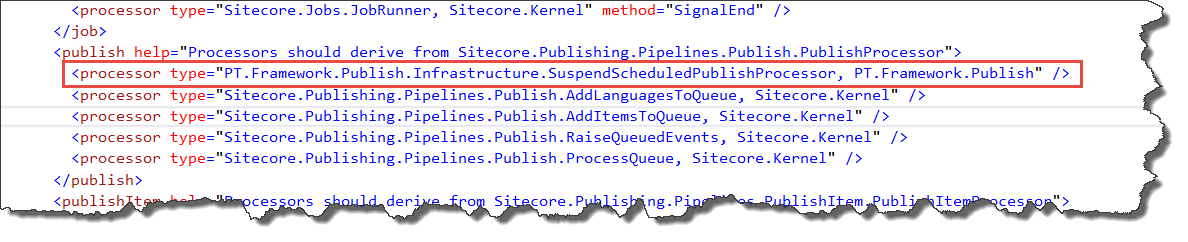
If you take a look in the Sitecore.Speak.config file in the include folder, you will see there is a speak.client.resolveScript section, which defines a server side pipeline that is responsible for resolving scripts.

The Sitecore.Resources.Pipelines.ResolveScript.Controls processor is used to load all the scripts required by controls. It has a section where you can define one or more sources. Take a look at the source which has the category “mfp” which I added so that the JavaScript for the application is included correctly.

  • Category – used to match which source to use to locate files.
  • Folder – the folder to search.
  • Deep – should it search sub folders.
  • Pattern – pattern to select files in the folders.
<processor type="Sitecore.Resources.Pipelines.ResolveScript.Controls, Sitecore.Speak.Client">
  <sources hint="raw:AddSource">
    <source folder="/sitecore/shell/client/Speak/Assets" deep="true" category="assets" pattern="*.js" />
    <source folder="/sitecore/shell/client/Speak/Layouts/Renderings" deep="true" category="controls" pattern="*.js,*.css" />
    <source folder="/sitecore/shell/client" deep="true" category="client" pattern="*.js,*.css" />
    <source folder="/sitecore/shell/client/speak/layouts/Renderings/Resources/Rules/ConditionsAndActions" deep="true" category="rules" pattern="*.js" />
    <source folder="/sitecore/shell/client/Business Component Library/Layouts/Renderings" deep="true" category="business" pattern="*.js,*.css" />
    <source folder="/sitecore/shell/client/Applications/MyFirstPipeline" deep="true" category="mfp" pattern="*.js,*.css" />
  </sources>
</processor>

This explains the mfp part of the base url (/-/speak/v1/mfp/) but what about the rest? The following setting specifies the prefix that should trigger the HTTP request customer handler for SPEAK.

<setting name="Speak.Html.RequireJsCustomHandler" value="/-/speak/v1/" />

Execute the pipeline

At last we are now ready to execute our pipeline, so we create the context, pass in the application and call execute. The context contains the pipeline specific information required by each step in the pipeline.
The first time the pipeline is executed all 3 steps are completed. The second time it will abort at the first step as the context property hasRun is set to true.


define(["sitecore", "/-/speak/v1/mfp/MyFirstPipeline.js"], function (Sitecore) {
 return Sitecore.Definitions.App.extend({
   initialized: function () {

   //clone the context, unless you want the changes to the context to be persisted
   var context = clone(this.currentContext);
   context.testAbort = false;

   //run the pipeline
   Sitecore.Pipelines.MyFirstPipeline.execute({ app: this, currentContext: context });

   //run the pipeline but it will abort
   context.hasRun= true;
   Sitecore.Pipelines.MyFirstPipeline.execute({ app: this, currentContext: context });
 }
 });
});

Well I hope you find this post helpful, as ever take it easy, Alan